How to Render Fat: Step-by-Step Guide for Lard, Tallow, and Duck Fat
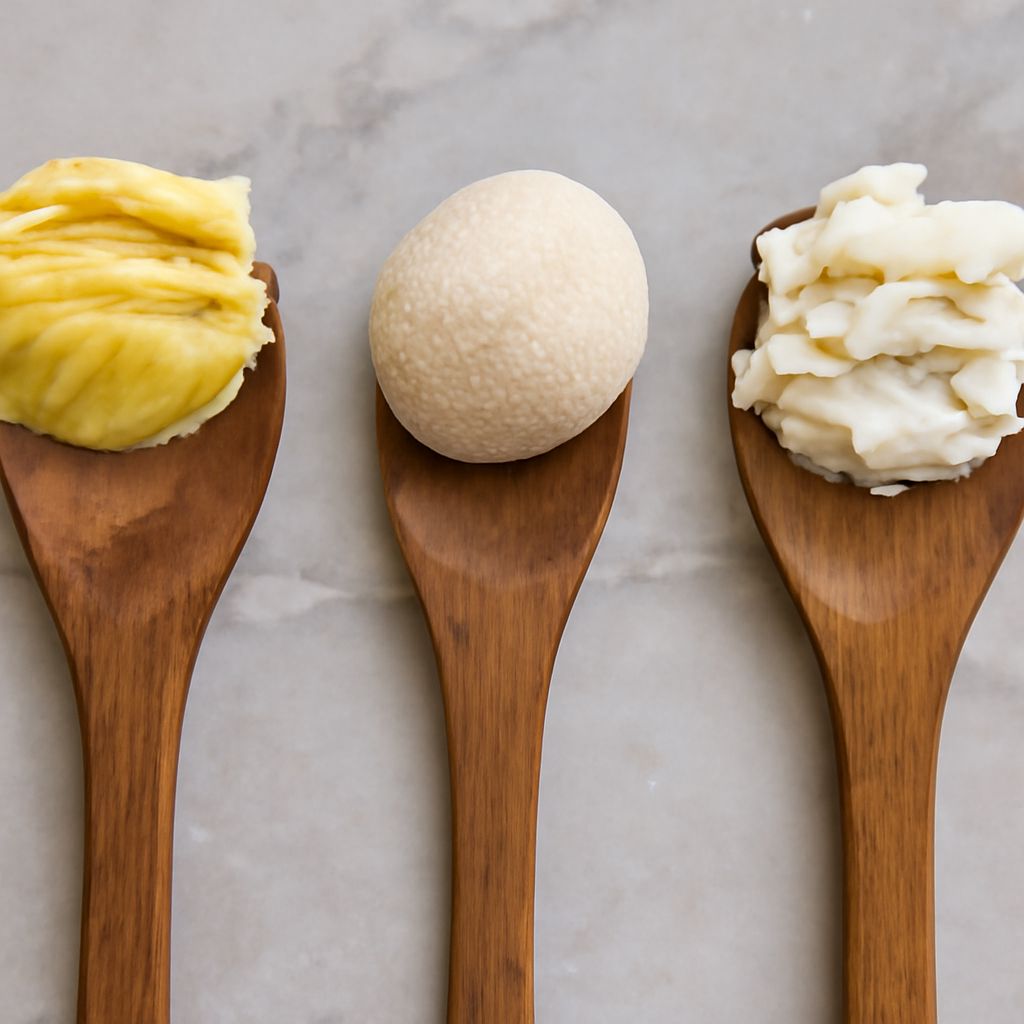
You have pork trimmings, beef fat, or duck skin sitting in your freezer and you want to turn them into something useful. Learning how to render fat is simpler than most people expect, and the result is a cooking fat with better flavor, higher smoke points, and longer shelf life than most processed oils. What does it mean to render fat? It means applying low, sustained heat to raw animal fat to melt and separate the pure fat from connective tissue, proteins, and water, leaving a clarified liquid that solidifies into a usable cooking fat when cooled.
What is rendered fat, exactly? It’s the purified fat that separates out during the heating process. What is rendering fat as a technique? It’s controlled low-heat cooking that drives water from the fat tissue without scorching it. Render the fat incorrectly by applying too much heat, and you’ll get a brown, bitter product with a reduced smoke point. Done right, you’ll have a pale, neutral-smelling fat that cooks everything from steak to pie crust with exceptional results.
Equipment You Need
- Heavy-bottomed pot or Dutch oven (cast iron or stainless steel)
- Fine mesh strainer or cheesecloth
- Glass mason jars or heat-safe containers for storage
- Sharp knife for cutting fat into pieces
- Thermometer (optional, but helpful)
How to Render Lard from Pork Fat
Leaf lard from around the kidneys produces the mildest, most neutral flavor. Back fat produces a stronger-tasting lard. Both work.
- Freeze the fat for 30 minutes to make cutting easier. Cut into 1-inch pieces or smaller. Smaller pieces render faster.
- Place in a heavy pot with 1/4 cup water per pound of fat. The water prevents scorching until it evaporates.
- Set heat to the lowest possible setting on your burner. Your goal is 200 to 220°F in the pot, not above.
- Stir every 15 to 20 minutes. The fat will slowly liquefy over 1.5 to 3 hours. Expect milky liquid at first as water evaporates, then clear golden fat with crispy cracklings settling to the bottom.
- When cracklings turn golden-brown and begin to sink, the rendering is complete.
- Strain through cheesecloth into clean mason jars. Do not squeeze the cheesecloth, which would force impurities through.
- Allow to cool uncovered at room temperature, then refrigerate. Lard keeps three months refrigerated, twelve months frozen.
How to Render Beef Tallow
Use beef suet (kidney fat) for the cleanest-tasting tallow, or fat trimmings from steaks and roasts for a stronger-flavored product.
- Cut suet into small pieces. Suet is drier than pork fat and renders more slowly.
- Place in pot with 1/4 cup water per pound, heat on lowest setting.
- Tallow takes 2 to 4 hours because beef fat has more connective tissue to break down. Stir every 20 minutes.
- Strain and store as with lard. Tallow solidifies to a harder consistency than lard at room temperature.
How to Render Duck Fat
Duck fat is the most prized rendered fat in French cooking. Use the skin from the neck, back, and abdominal cavity, plus any visible fat deposits.
- Score the skin in a crosshatch pattern, which speeds fat release.
- Place skin in a cold skillet, turn heat to medium-low. Duck skin renders more quickly than pork or beef fat: 30 to 60 minutes for a reasonable batch.
- As fat accumulates in the pan, spoon it off into a jar every 15 minutes to prevent the skin from simmering in its own fat and browning.
- Strain and refrigerate. Duck fat keeps three months refrigerated and is shelf-stable for months at cool room temperature in a sealed container.
Using Your Rendered Fat
- Lard: Pie crusts, biscuits, tortillas, tamales, roasted potatoes, frying chicken.
- Tallow: High-heat searing of steaks and burgers, french fries, roasting vegetables at 425°F+.
- Duck fat: Confit preparations, roasting root vegetables, sauteing mushrooms, scrambled eggs.
Bottom line: Rendering fat at home produces a superior cooking product from what would otherwise be food waste. Use the lowest heat possible, be patient with the timeline, and strain thoroughly for a clean-tasting result. The whole process takes less active effort than most baking projects, most of the time is just waiting.
Related Posts

Lipedema or Just Fat: Understanding the Difference

Kung Hee Fat Choy: Exploring Nutrition and Fitness